GPIO for serial connections
Overview
Teaching: 30 min
Exercises: 30 minQuestions
What kinds of serial connections are there?
How do you enable serial connections?
Objectives
Turn on overlays for serial interfaces
Wire up the appropriate pins for serial connections
Use Python to receive and output data from a serial device
There is a universe of sensors and other devices that can talk over some kind of serial interface. There are several different serial interfaces supported by the Raspberry Pi (depending on exactly what you mean by “serial interface” and “supported”). This high level overview provides an introduction to the kinds of protocols that are supported.
This guide will focus on one of the simplest and most common. The others are similar in principle and vary mostly in the details of how they’re implemented.
1-wire
This example uses the DS18B20 thermometer which communicates over a 1-wire serial interface. This is a device which appears in a number of different form factors, including weatherproof, immersible devices.
To enable the 1-wire interface on the Raspberry Pi, you need to add (or uncomment) a line in /boot/config.txt:
dtoverlay=w1-gpio
After making this change, you need to reboot the Pi for the change to take effect.
If you want to know what these lines represent, you can read the Device Tree documentation but the short answer is that it tells the system how (or perhaps “which”) physical hardware should be represented in the file system so you can access it. In this case, it creates an entry in the file system so that data received via GPIO 4 will appear in a file somewhere below the /sys/bus/w1 directory.
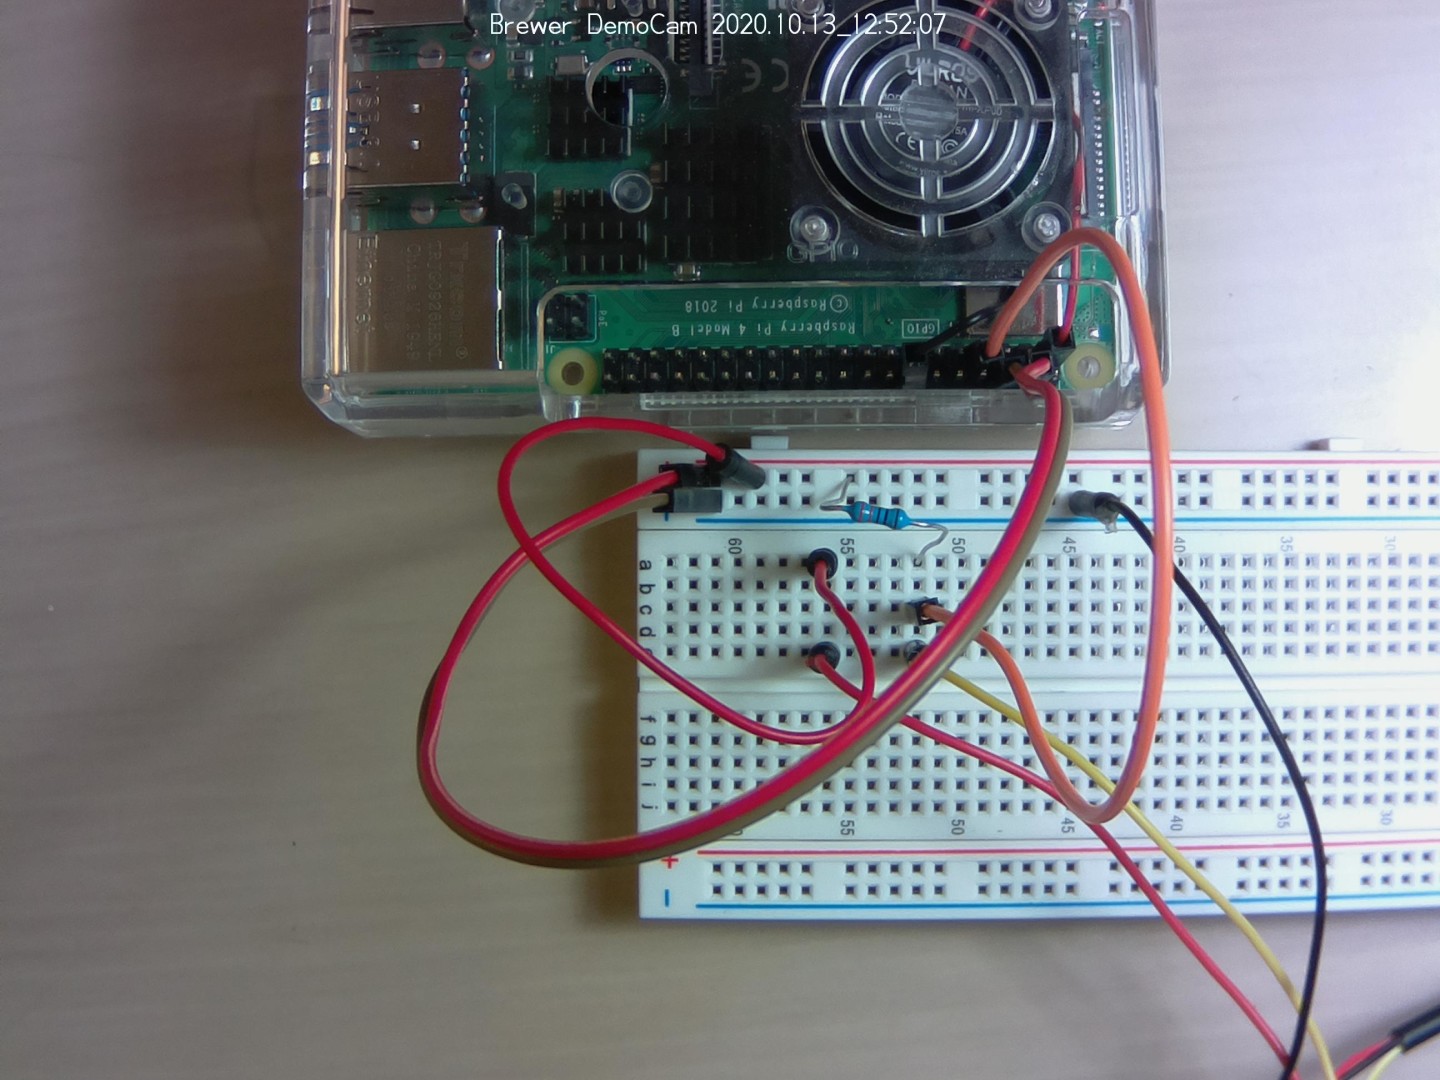
You can connect 1-wire devices with three connections: power, ground, and data. But you also need a strong resistor (4.7kΩ or 10kΩ) to go between power and data to “pull up” the connection.
Once you have the thermometer connected, you should be able to look inside the /sys/bus/w1/devices directory and see the file-system entry for the thermometer. It will use a unique identifier that begins with “28”. Make a note of this identifier.
To see what data the thermometer is sending you can read the data directly by using cat:
cat /sys/bus/w1/devices/28-01191a3c12d5/w1_slave
30 01 4b 46 7f ff 0c 10 09 : crc=09 YES
30 01 4b 46 7f ff 0c 10 09 t=19000
The “t=” shows the temperature in Celsius times 1000.
The DS18B20 device is really amazing. Read the data sheet for more information about its full capabilities.
Here is a script in python that can read the data from the thermometer and output the values as a CSV file with a time stamp.
#! /usr/bin/env python3

import time

device = '/sys/bus/w1/devices/28-01191a3c12d5/w1_slave'
#    Unique Identifier --->   ^^^^^^^^^^^^^^^

try:
  while True:
    file = open(device, 'r')
    line = file.readlines()
    file.close()
    t = line[1].find('t=') # find position where 't=' is
    if t :
      temp_val = line[1][t+2:] # grab what's 2 characters after position
      temp_c = float(temp_val) / 1000.0
      timestamp = time.strftime("%Y-%m-%d %H:%M:%S", time.localtime())
      print(f'"{timestamp}",{temp_c}') #enclose timestamp (a string) in quotes
      time.sleep(1)
except:
  file.close() # make sure the file is closed
  print("done.")
This example uses a single device, but you can actually connect multiple devices at the same time that can even use the same pull-up resistor. This makes collecting multiple temperature readings (for example) very simple.
Key Points